St. Louis Park Addition Exterior

This St. Louis Park Addition Exterior is close to completion. The garage door and exterior lighting fixtures will be here soon and the deck rail to the back stairs will be installed as well.

An important part of this project was accomplishing the homeowner’s goals while matching the architectural style, colors and materials of the existing home.

When the landscaping and plantings are in, this St. Louis Park addition will blend wonderfully and really look as if it was built as part of the original house. Our sincere thanks and kudos to Bryan Anderson and SALA ARCHITECTS for their design work on this project.

That’s what makes a renovation a Showcase Renovation!

St. Louis Park Addition Framing & Exterior

The framing is complete and even includes a bonus crawl space between the new construction and the existing structure. Some photos during the progress.

— You can see the steel beam (we used a crane to set this one) used to support the deck and framing above the garage. And a shot of the rough framing when complete.


— This is definitely a room with a view! The room above the garage not only provides a great view of nature but there is a wonderful deck for enjoying the view from the outside. This deck will wrap-around the addition and there is an extra wide overhang to provide shade and protection from the elements.

St. Louis Park Addition Foundation

This stage of the project shows the poured concrete foundation walls and cement block walls where appropriate. These concrete walls will give a finished ceiling of over 10′ for this St. Louis Park attached garage addition when completed.

— On the left is the foundation ready to be capped. On the right is a shot of two poured columns with core filled block on top in anticipation of supporting a wrap-around deck.


— These two images show the cap load – called that because the lumber is used to put the initial cap on the foundation. And a look from the top in the back showing the reinforced concrete wall with insulating drainage board (R value of 5) over watchdog H3 waterproofing.


— And of course none of this happens without some carpenters that are ready to go!

St. Louis Park Garage Addition With Living Space Above

This project is the replacement of an old and aged detached garage with an attached tuck-under while adding usable living space above. This will also gain space for landscaping and esthetics in the yard while benefiting the curb appeal and live-ability of the home. Note the image at bottom after 3″ of rain.

— These imagess show the existing garage and the site plan illustrating the new relationship of the garage to the home with the new living space above.


— These images show the amount of excavation required and a computer rendering of the planned front elevation.


— The shoring up of the excavated area along the existing structure is done with large plates of steel held in place by long steel pipes driven into the soil. Stabilization of this type is critical to maintaining the integrity of existing structures. That the water is deep enough for a swim is just a bonus!

Concrete and Framing

In this post we have just a couple progress pics and at the end a couple tidbits.

It was a good day to pour concrete! Here you can see the soon-to-be crawl space area on the right. The pour went exceptionally well and the great weather certainly didn’t hurt!


A morning’s start on the back porch framing and below it – later that same day a garage frame with rafters and roof sheeting!

Notice the garage has five (5) doors! A double, a single, two patios, and one service door!


On the left you can see where we cut an access to the attic above the kitchen, dining, and bathroom areas that are getting remodeled. This is so we can vacuum out all the insulation and other loose material before pulling down the ceilings. It’s a great way to minimize dust. On the right is a courtesy we extend on our projects that both our trade partners and the homeowners appreciate – out in the woods even!

Demolition and Excavation In Corcoran

The demolition has taken place. The first image shows some of the demo in prep for a new exterior finish on the home. It will include siding replacement with new soffit and facia as well as a new front entry deck and bay window treatment. The second shows the beginning of the end for the existing garage.


A brief display of machine against garage.

As you might expect, the machine won handily, resulting in a clean job site for excavation in preparation for the concrete footings and cement block work.


This last shot shows some of the existing cement block and foundation that has been left in place in as part of what will become a very sizable crawl space. We’ll show you a pic of the crawl space in our next post as well as a finished concrete slab!

Corcoran Addition | Kitchen and Bath Remodel

This project incorporates remodeling a kitchen, adding/remodeling a bathroom, adding new space, a crawl space, as well as some exterior updating and improvements. It takes place in Corcoran, a Northwest Twin Cities suburb just west of Maple Grove and Plymouth. Read a homeowner’s summary here.

We’ll cover the project as it goes and try to keep it interesting and informative. We start with demolition and some of the preparation that good contractors employ when starting a project like this.

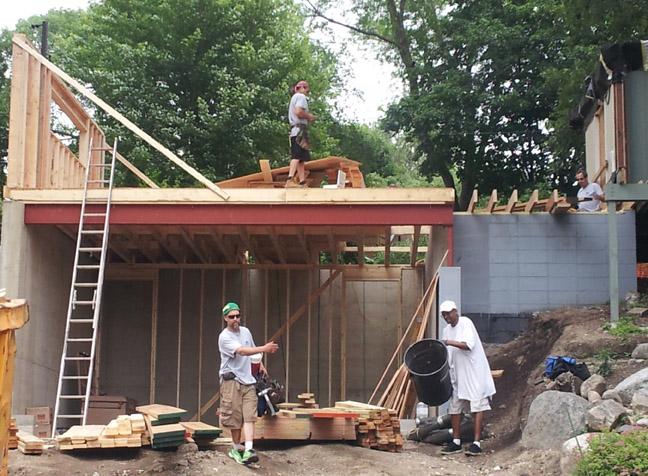
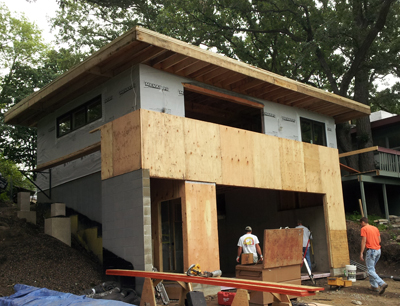
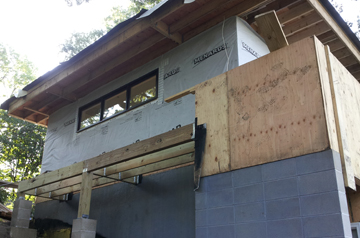
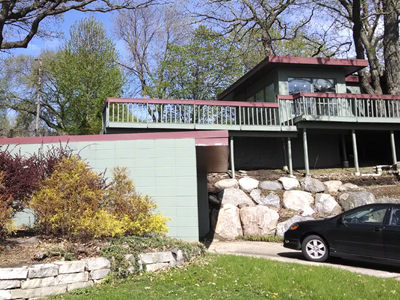
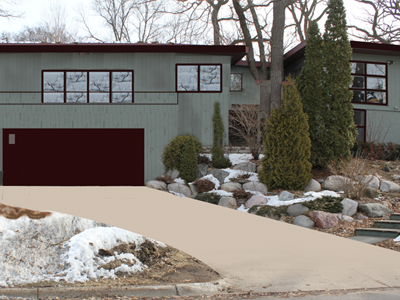
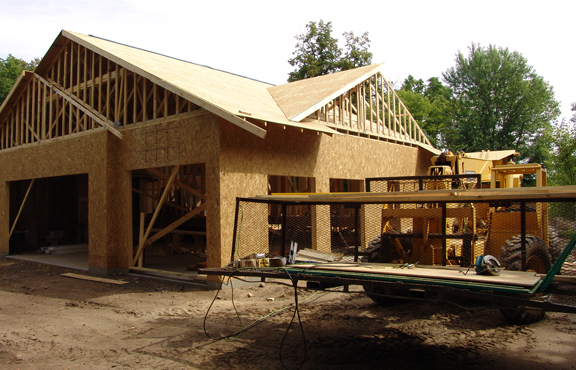
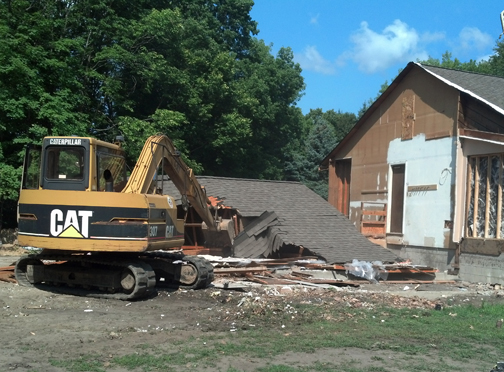
The porch you see will be re-built, the siding replaced, and the garage removed as well as a 4 season porch and other structure in back.


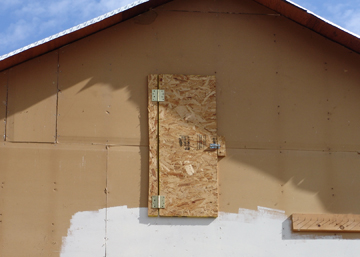
Notice the removal of windows, doors, and any glass or other items that can present a hazard during and after the demolition – best practice for any demo job where people live and work, especially when there are children around.

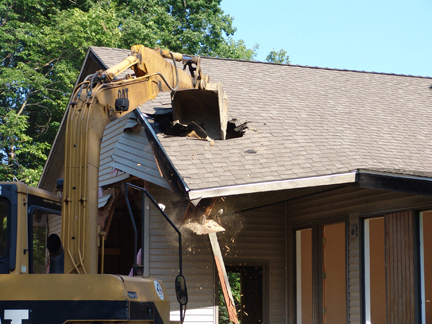
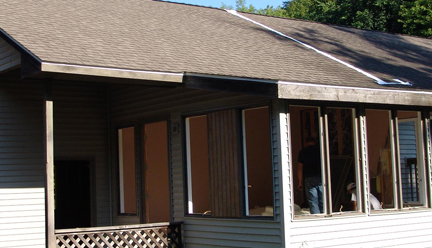
Of note in this image is placement of the cuts for separation of the demolished portion:
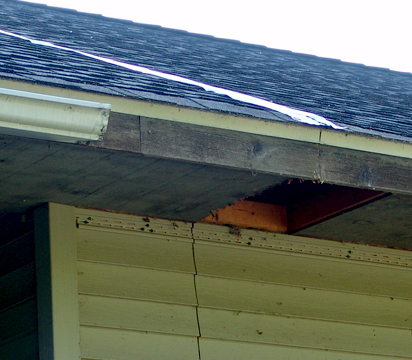
  • siding
  • wall sheeting
  • gutter
  • shingles
  • roof plywood
  • soffit
    As well as cuts you don’t see that remove interior ties from the garage to house, including termination of any plumbing supply lines or vents and any wiring. Notice the ‘very sticky’ tape covering the shingle cut – a nice detail against water damage should the weather turn on us.
  • A brief video of the roof cut being made – getting through shingle, shingle felt, and the plywood or oriented strand board (OSB).

    NEXT UP: DEMOLITION!